Pumpkin Pro Fun World Pumpkin Pro Colossal Carving Kit, 8+, 10 count, 1 Each
Count
Sale Information
productAttributes.Preparation & Usage
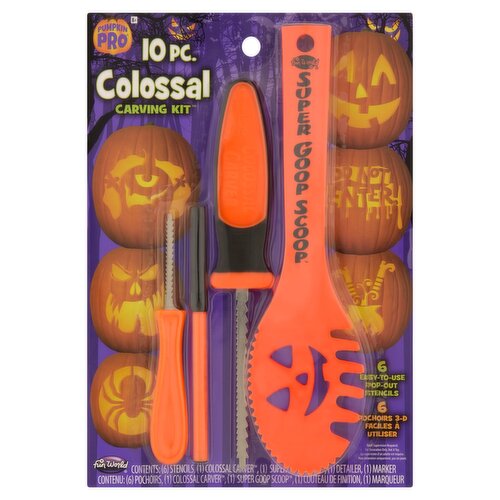
How to carve a perfect pumpkin! Please read and follow all instructions. Kids, remember to have your parents help you carve your pumpkin. Start Cut a wide circle around the pumpkin stem using the Pumpkin Pro® Colossal Carver™. Press saw in gently to break pumpkin skin-do not stab or jab. Pull the cut lid off the pumpkin by the stem. Do not use the saw to pry off the lid. Scooping Use the Super Goop Scoop™ to scoop out the inside of the pumpkin. Use the serrated edge for scraping the goop at the bottom and sides. Use the combed edge to scoop and remove the goop from the bottom of the pumpkin. Easy pop-out stencils for stencil tracing First choose the stencil you wish to use. Remove from the stencil from the book along the perforated outline. Easily push and pop out the shaded area of the stencil. We recommend taping the stencil onto the pumpkin surface. With the marker pen, trace each part of the popped out area of the stencil onto the pumpkin. Carving Using the Colossal Carver™, cut along the marker lines you made on the pumpkin. For small or detailed areas you may want to use the Detailer Carving Knife included in the kit. Saw with an in and out motion. When your pumpkin is completely carved, wipe off any remaining marker lines with a damp cloth. Remove cut out pieces from inside the pumpkin and your pumpkin is ready for lighting. To light your pumpkin we recommend choosing from our wide variety of safe, flame-free battery-operated pumpkin lights.
Sale Information